
Welcome to our first Mondo’s Cycling Routes blog post. This is where we will share our recommended cycling routes around Derbyshire and wider England and tell you how it went for us, what to look out for, and prep tips.
Please feel free to download the GPX file if you wish to ride this route for yourself.
If you live or visit the Derbyshire countryside or Peak District areas, you would most definitely know about Ashbourne and the Tissington Trail. On Sunday, 5th October, we drove up to Ashbourne and parked up at the leisure centre to embark on what we call “The Tissington & High Peak Loop”. This loop begins at the start of the Tissington Trail in Ashbourne and continues up to Main Street, which begins the loop up to Parsley Hay, before making your way back onto and along the Tissington Trail back into Ashbourne. A nice scenic 31 miles of gravel tracks with one gnarly section of slightly rocky descent.
NOTE: If you don’t normally do rocky paths and want to stick to smooth gravel trails, please feel free to continue along the trail to Parsley Hay - Your cycle computer will get confused at first, but will continue past the turn off from the trail.
If you are skipping the gnarly section, you can ride from Ashbourne to Parsley Hay, which is 13.5 miles - turning round at Parsley Hay to return, making it a nice 27 miles of riding.
Before leaving for this ride, make sure you have the essentials!
- Rain Coat / Waterproof Jacket
- A Bell / Strong Voice
- Puncture Repair Kit / Spare Tube & Pump
- A Gillie or Windproof Jacket
- Water or Electrolyte Drink
- Gels or Sweets
- Food (if not planning on a cafe stop)
The things to remember about this area and type of trail are that the weather can be very unpredictable and can become windy or wet at a second's notice. Make sure to check the weather report to ensure the conditions are to your liking. A bell or a friendly yet strong voice is needed along these trails, as there are a few hikers, bikers, and dog walkers.
The Ashbourne leisure centre car park - what to note.
We would recommend arriving early mornings between 8 and 10 to beat the rush of hikers and bikers. If you don’t like parking apps, make sure you have some pound coins for the ticket machine! We would recommend 4-5 hours of parking, but this does depend on your fitness, style of riding, and whether you want a proper cafe stop. If you aren’t particularly quick or love a long coffee break, get an all-day ticket.
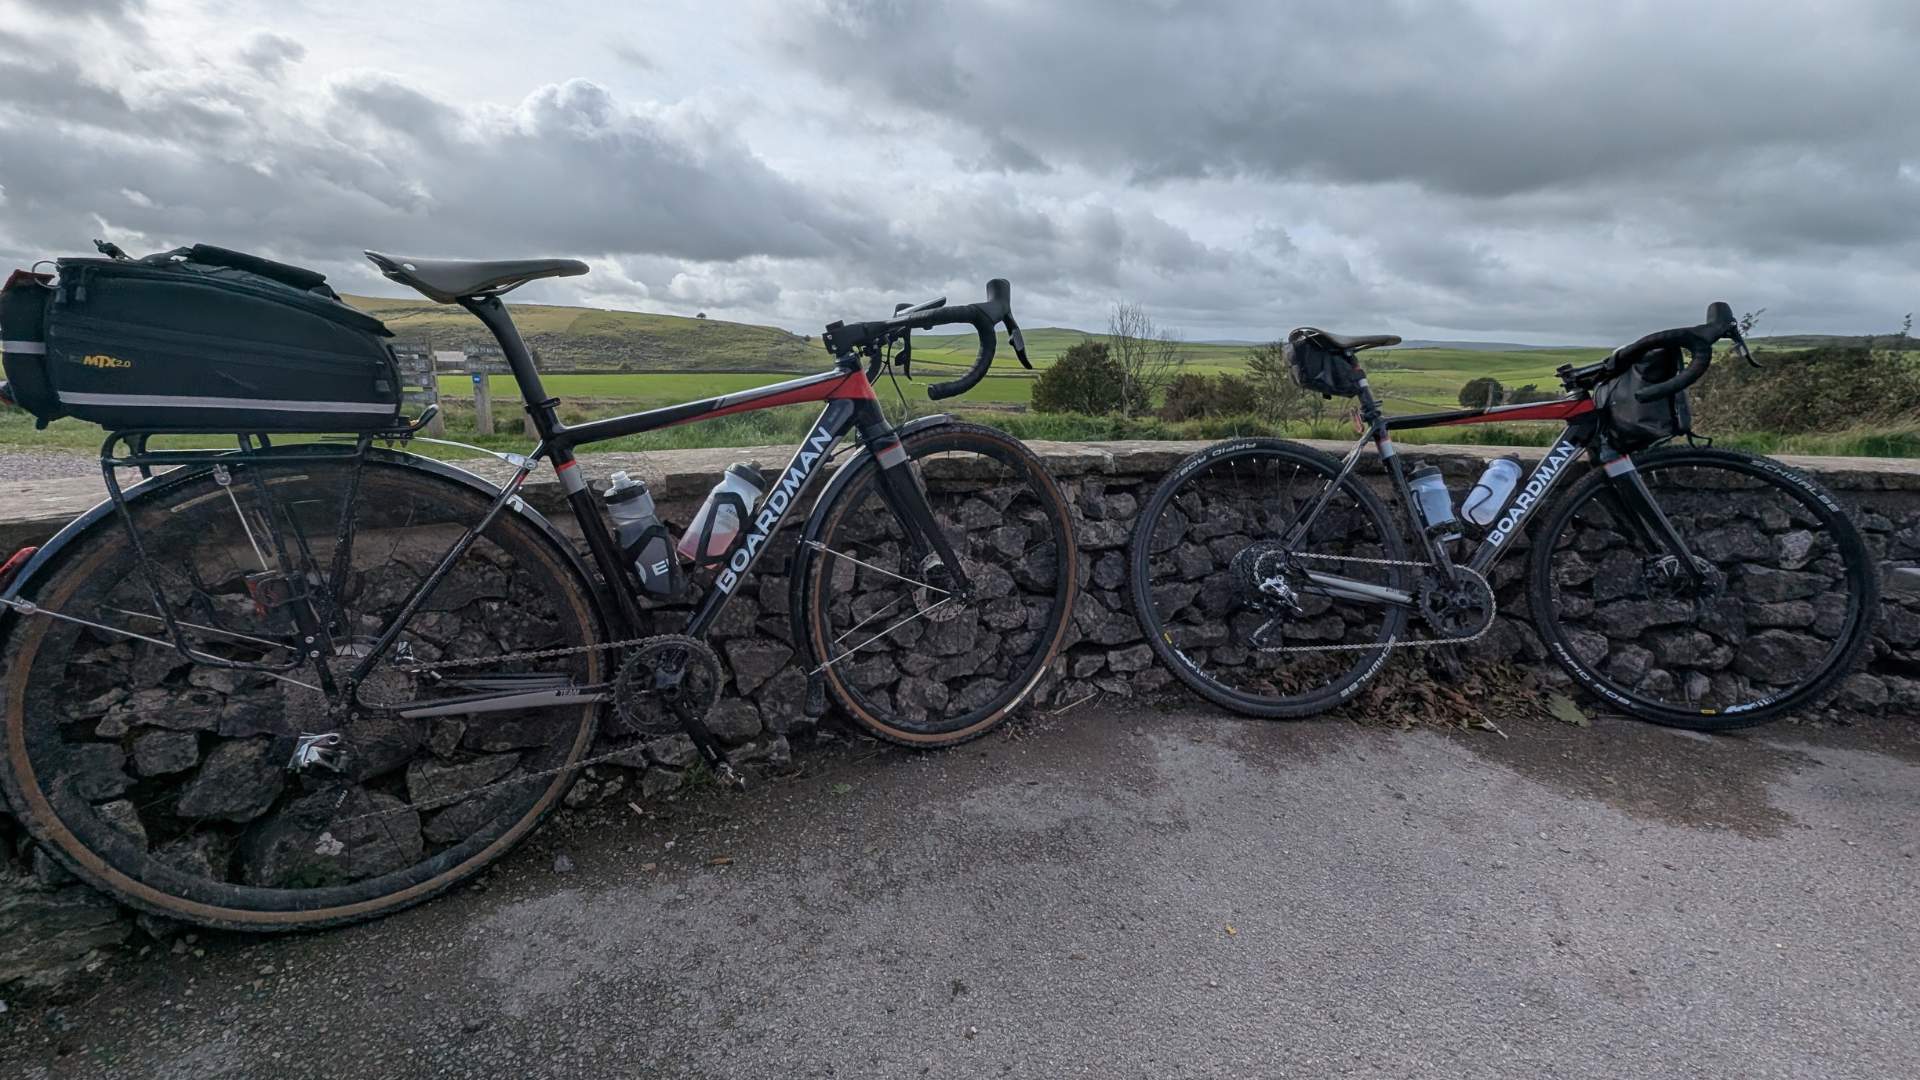
The bikes
We ventured along this loop on our trusty Boardman Team CX gravel bikes. Ray’s was fairly stock, minus his double-rapped bars and bar bag. Whilst Anthony’s had been extensively modified.
Modifications to Ant’s bike include;
- One-piece carbon stem and bars
- Electric shifting
- Mudguards
- Pannier rack
- Gravel King 35mm tubeless tyres
The tubeless tyres would definitely prove their worth come the gnarly section!
We would recommend this loop for either a gravel or mountain bike with tubeless tires if possible. If you are running normal tubes, you can ride the full loop; however, take it easy come the rocky descent.
The Kit & Refreshments
We both had two bottles of electrolyte drink (High5 to be exact) and at least one energy gel each. Aside from this, Anthony brought along some crisps and a small packet of sweets. Sweets, whilst not necessarily healthy, are in fact a great cycling snack as the large quantity of sugar will provide an energy boost when most needed. Haribos are highly recommended; however, in efforts to remain fruity, Anthony had Fruitella! Ray is also a regular carrier of a banana as they are a great source of energy, fibre, potassium, and vitamins.
The kit was long John leggings and padded bib shorts, an under top/layer, a jersey, a winter jacket, and Ray had a gillie for wind protection. At this time of year, moving into the colder seasons, it is key to keep the cold away from your chest, as you may develop a cold or similar illnesses from such riding. We both also wore helmets with cycling caps underneath and padded cycling gloves. In our bags, we carried a waterproof jacket each as well as our puncture repair kits, tubes, and the snacks mentioned above.
Both of us are regular users of clipless pedals as they help us remain efficient when riding and provide us with more comfort. Ray is using Time, and Anthony is using Look gravel edition. If you are exploring trying clipless pedals, otherwise known as cleats, we recommend you practice clipping in and unclipping in a safe place on grass, as it is easy to feel stuck in these pedals, resulting in falling off your bicycle. We would not recommend using cleats along these trails, as you need to be prepared to unclip due to walkers and possible loose dogs.
Note: One section of the Tissington Trail is open to the elements, including winds. This section can become dangerous if winds are high - continue with caution as these winds are typically cross winds capable of causing unbalance.
Note: The first turn off from the trail, beginning the loop, goes along a rocky and bumpy section. If you are a novice or uneasy rider, please continue with caution or ignore that turn off, continuing along the Tissington Trail itself.
Tissington Trail
The Tissington Trail is a long-time classic within the Derbyshire Countryside and originally made up a key part of the northern railway lines which ran through the Peak District! Most of this heritage and history you can still explore through information plaques and remaining rail signs, and signalling posts.
Starting from Ashbourne, you first go past a bicycle hire shop before going into a fairly long railway tunnel; fortunately, they have lights inside; however, for some, it may still be quite dark, so remain cautious and use a light if needed. After the tunnel, you are met with a gate. Going through this gate and through the dip, there is another gate; however, once past this, you don’t have any more gates for roughly 9/10 miles.
Now you begin the Tissington Trail! From Ashbourne, you will spot a sign detailing how far to specific locations. Tissington village is noted as 3.5 miles.
Whilst this distance doesn’t sound far, the entire section of the trail is of a slight ascent and therefore will feel harder. This is why we recommend taking your time when beginning this loop.
If you aren’t stopping off at the wonderful village of Tissington, you may continue on the trail; however, whether you do stop now or on the return, we highly recommend the Tissington tea rooms next to Tissington Hall.
Getting To Tissington Tea Rooms
When you reach Tissington carpark, ride through the carpark (Watching out for vehicles and people) up to the exit. Turn left and continue along Darfield Lane. You will eventually see a small lake on your left and a couple of lanes on your right. Turning right along Rakes Lane, you will see the tea rooms and the impressive historical manor. Here they have a great selection of cakes, hot food, sandwiches, and hot or cold drinks. Repeat the route backwards to continue along the trail.
Continuing Tissington Trail
Continuing past Tissington Village, you are now cycling for roughly 9 miles before the turn off onto tarmac. Most of which will continue slightly uphill and relatively calm, with picturesque scenery.
Coming up to a 3rd of the way done this section, you will find yourself coming out onto the section of trail which becomes very open to the surrounding elements. During times of high winds, the crosswinds can become challenging and worse force you to dismount or even get off the trail itself. Please remain cautious and make sure you are up to date with the weather. In a lighter mind, on a regular and calm day, this section is perfectly ridable, but still may gather a slight gust due to being so open.
On the day we rode this windy section, we had the tail end of storm Amy to contend with, and both had to ride at angles to continue riding. We only did so as we are well-seasoned cyclists, and the trail at this point was quiet, running no risk of harming others should our experience and skill run out.
Coming to the end of this section and turning to the right, you will see the next section appear on the right as you approach. This small piece of trail has a gate at the bottom leading on to a road. At the gate, turn left along the road.
The Gnarly Bit - Beginning The Loop
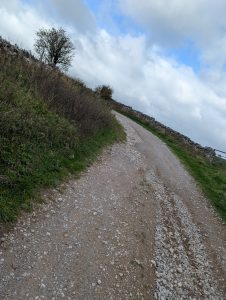
Continue along this road, turn left onto the main road at the bottom, and then immediately left. This section of the trail or track should have big holes along its entirety, typically filled with water after rain. Feel free to ride the small puddle if you like that thing… but remain cautious about the larger puddles and holes as they can be deeper than they appear, and when full of water, you don’t know what lurks beneath. Continuing straight along this track, you will come to a large farm gate. Open this gate (remember to close it) and continue straight again until yet another farm gate.
After this last gate, you will begin your descent. It will feel very rewarding after the ascent up the Tissington Trail; however, this will soon become very rocky, and as we say in gravel biking… GNARLY! So take your time and if new to this ground, keep an eye out for the dirt peering through the rocks, and stick to these lines as they will be easier to control your bike on. The rocks are often quite deep, sharp, and will cause some sliding around. With the rocks being sharp, we do recommend tubeless at best or slime tubes at the least, as they will cause punctures fairly easily.
Back To The Trails
Remaining cautious of walkers on the descent, you will come to another farm gate. Through this gate, you will find yourself on another tarmac road. Turn left along this road until you come to a bridge. Before the bridge, turn right and then take the next left. Along this trail, you will come across crossroads of dirt tracks. Just continue straight and be mindful of farm traffic warnings.
Take the trail on the left and continue along until you reach a road crossing and gates on either side of the road. Always look both ways and listen carefully before crossing, as cars do travel fast along this road.
After the road, take the trail to the left (not the one signposted for Pennine) and stick to this for some time. You will come behind some factory buildings and farm land. This is normal. Again, look out for farm traffic when signposted. There are a few gates along this section, too.
Once you come underneath the underpass, you will now be back on the Tissington Trail, making your way to Parsley Hay!
Parsley Hay
You will eventually pull up to a scenic stop with seating, bike hire, and a cafe! We recommend using the seating and wall to recover, eat, and take in the surroundings. Love that fresh air.
When we arrived here, we had to reseal Ray’s slime tubes after a puncture from the Gnarly rocks, but then noticed a storm closing in. As we know the area well, we knew it was time to make our way back to the van in Ashbourne. In open countryside like these trails, if you see rain afar in the hills with the wind coming towards you as you look, there is a high chance that the rain you are seeing is heading your way. This is one advantage of being able to see out for miles, but also a great example of how quickly things can change up there.
Parsley Hay to Ashbourne - 13.5 miles
Returning along the Tissington Trail (the way you arrived from), you will come across the split section. Here, you must take the right-hand side split to continue on the Tissington Trail.
On this journey, you will come across the beautiful stop at Hartington (we didn’t stop here, but we know they recently had a restoration carried out). Again, on the way back toward Ashbourne, be mindful of the windy gap or open section. If it seems windier than before or is still windy as when you left Ashbourne, remember to take the same caution as before.
Returning to Ashbourne along this trail will feel so much easier as you feel that slight gradient as you descend toward Ashbourne. If you like Strava segments, you can get a decent speed, but please only do so safely and when very quiet on the trails! Other than reminding you of the gates at the dip and the tunnel, please remain respectful of walkers, as it tends to get busy at later times. Also, keep an eye out for wandering dogs, as many walkers don’t use leads…
Round Up and Thoughts
Ray, whilst he has a good racing pedigree, is certainly not a young chap now, and his round-up may reflect what you feel too.
The slight ascent at the start of this loop can really take it out of you if you don’t pace yourself right, and the gnarly section is definitely more suited to the skilled riders and better with a tubeless setup. Ray punctured on the rocky descent as he hit a large rock. Fortunately, he did have slime tubes, which surprisingly sealed very well… after a few stops to add more air to help the seal. Had he not had slime, it would have most certainly been a repair or tube replacement on the roadside.
Gravel tracks do tend to feel more fatiguing, typically because of the increased resistance from the off-road tyres as well as the surface. With plenty of electrolyte drinks, a gel, and a few sweets, however, he made it back to Ashbourne with no issue.
Anthony’s thoughts may reflect the younger and fitter of the bunch! Yes, he could have gone a lot quicker if Ray wasn’t with him, but it wasn’t about that. This ride was about enjoying the trails with his dad and getting to do something new with each other, as Ray hadn’t done much gravel biking and wanted something with less tarmac involved - something which can be difficult in South Derbyshire unless you are using the canals. The Gnarly section is always fun with the skill and tubeless setup! No worries, just thrill. Of course, some more seasoned or professional gravel riders would’ve maybe seen that as nothing big, but it is still a fun technical descent.
If you like this blog or just the recommendation of the route, please follow us on Facebook or Instagram. If you want to see us video our cycling adventures too, please let us know on social media, or if we repair your bicycle!